
3D Graphics
Real-time Speed (Eevee) vs High-Quality Realism (Cycles): Complete Blender Renderer Comparison
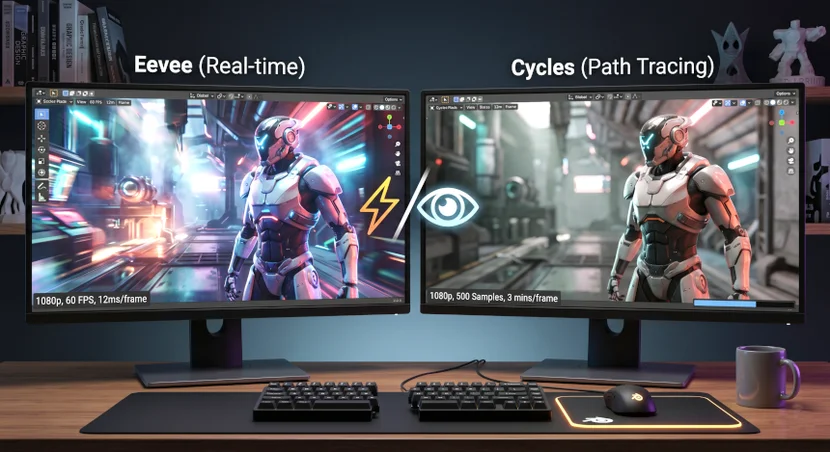
Perfect Comparison of Blender Renderers: Real-time Speed (Eevee) vs. High-Quality Realism (Cycles)
Blender is a free open-source 3D software that lets you handle everything from modeling to animation to rendering in a single program. Among these features, the renderer is a core function that converts completed 3D scenes into actual images or videos.
In simple terms, a renderer acts like a “camera + darkroom” for your 3D set. Just as the quality and shooting time of photos vary depending on which camera you use, the quality and work speed of your results vary greatly depending on which renderer you choose.
Blender primarily offers two renderers: Eevee and Cycles. Let me organize the characteristics of each in a table below for quick reference.
| Item | Eevee | Cycles |
|---|---|---|
| Rendering Method | Real-time Rendering | Path Tracing Based |
| Speed | Very Fast | Slow (can differ by tens of times) |
| Realism | Medium Level | Very High (photographic quality) |
| Primary Use | SNS Content, Preview, Fast Animation | Film, Advertising, Product Visualization |
| Hardware Load | Low | High (GPU recommended) |
Eevee works similarly to modern video game engines. It omits some of the physical calculations of light and processes it to look visually plausible, which is why it’s very fast.
Cycles mathematically and precisely calculates how real light bounces, refracts, and reflects in space. As a result, the output looks as realistic as a photograph, but it takes much more time.
Perfect Comparison of Blender Renderers: Real-time Speed (Eevee) vs. High-Quality Realism (Cycles) – Tutorial Usage
Changing the renderer is very simple. In the Properties panel on the right side of Blender, click the Render Properties tab that looks like a camera icon.
You can select Eevee or Cycles from the Render Engine dropdown menu. Immediately after selection, you’ll notice the preview method in the viewport (work screen) also changes.
When Eevee is selected, you can increase visual quality by enabling options like Bloom (light bloom), Ambient Occlusion (natural shadows in corners), and Screen Space Reflections.
When Cycles is selected, you can significantly increase rendering speed by choosing GPU ComputeDevice section. GPU settings must be enabled at Edit → Preferences → System → Cycles Render Devices.
When working with Cycles, be sure to enable GPU. If you have an NVIDIA card, select OptiX; if AMD, select HIP. You can get results that are several to tens of times faster than CPU-only rendering. Settings path: Edit → Preferences → System → Cycles Render Devices
Perfect Comparison of Blender Renderers: Real-time Speed (Eevee) vs. High-Quality Realism (Cycles) – Step-by-Step Setup Method
When setting up a renderer for the first time, you can proceed without mistakes by following these steps.
Select Render Engine
Click the camera icon (Render Properties) in the Properties panel on the right. From the Render Engine dropdown at the top, select Eevee or Cycles. Choose Eevee for fast work, or Cycles for the highest quality.
Cycles GPU Setup (when Cycles is selected)
Go to Edit → Preferences → System from the top menu. In the Cycles Render Devices section, check CUDA / OptiX (NVIDIA) or HIP (AMD). Return to Render Properties and change Device to GPU Compute.
Adjust Sample Count
Samples determine how many times light is calculated. Higher values mean better quality but longer processing time. For Cycles, 32-64 samples are recommended for test renders, and 128-512 for final renders.
Enable Denoising
Enable the Denoising option in Render Properties. This feature automatically removes noise (speckles) even with low sample counts, creating clean results. It’s particularly effective in Cycles.
Execute Rendering
Press F12 on the keyboard to start rendering from the current camera view. To save the render result, press Image → Save As (shortcut: Shift+Alt+S) and save as PNG or JPEG format.
Perfect Comparison of Blender Renderers: Real-time Speed (Eevee) vs. High-Quality Realism (Cycles) – Workflow Tips
Professional artists strategically choose between Eevee and Cycles depending on the situation. Here are the key tips for making these decisions.
- ①Draft work with Eevee — When establishing layout, composition, and lighting placement, use Eevee for quick confirmation. You can save tens of times the amount of time.
- ②Final output with Cycles — For cases where quality matters, such as portfolio work, client deliverables, or print images, always use Cycles.
- ③Always add HDR environment texture — Open the World tab in Shader Editor and connect an Environment Texture node to make surrounding reflections much more natural. The effect is especially noticeable in Cycles.
- ④Enable reflection and shadow options in Eevee — Activating Ambient Occlusion, Bloom, and Screen Space Reflections in Render Properties allows Eevee to produce much higher quality results.
- ⑤Use 32 samples for Cycles test renders — Testing with high samples every time is a waste of time. When testing, lower the sample count to 32 and enable Denoising for quick verification.
- ⑥Adjust output resolution — Lowering the resolution from 100% to 50% in Output Properties reduces rendering time to about one-quarter. Only increase it back to 100% before final delivery.
When rendering materials that transmit or refract light, such as glass, diamonds, or water, always use Cycles. Eevee has limited refraction calculations and may produce strange results. In Cycles, setting the IOR (refractive index) to 2.418 based on diamond properties gives realistic effects.
Perfect Comparison of Blender Renderers: Real-time Speed (Eevee) vs. High-Quality Realism (Cycles) – Cautions and Warnings
Here are common mistakes that beginners make when using Blender renderers. Knowing these in advance can greatly reduce trial and error.
Even if you select Cycles, if you don’t separately enable GPU settings, it will automatically render with CPU. This can make rendering tens of times slower, so you must check GPU in Edit → Preferences → System and change Device to GPU Compute in Render Properties.
Because Eevee simplifies light refraction calculations, glass or transparent materials may appear black or render strangely. In this case, check Render Properties → Screen Space Reflections → Refraction, or enable Screen Space Refraction in the material settings for that object.
Simply raising samples to 4096 or higher doesn’t automatically improve quality. If noise is already sufficiently removed, increasing samples further makes little difference while wasting time. Enable Denoising and first check results at 128-256 samples.
Also, if you close the window without saving the render result, it will disappear. When rendering is complete, always immediately press Image → Save As (Shift+Alt+S) to save. Make this a habit.
Finally, if your PC specs are low, don’t try Cycles rendering with large resolution and high samples simultaneously. Blender may force quit due to insufficient memory. It’s safer to lower the resolution to 50% or simplify the scene first.
Change your renderer right now!
Choose Eevee when you need fast speed, and Cycles when you need photorealistic results. Simply enabling GPU settings and Denoising properly makes a noticeable difference in work efficiency. Press F12 right now and see the difference between the two renderers with your own eyes!