
3D Graphics
Why Marvelous Is the Go-To for Character Clothing
Why Marvelous Is the Go-To for Character Clothing
On August 24, 2026, CLO Virtual Fashion released Marvelous Designer 2026.1. The update centers on three core features: tearing, pinching overrides, and brush pinching with blendshape animation support. A limited Pioneer Program kicked off on July 16, giving 100 early access users first hands-on experience, and the new toolset was also available for demo at SIGGRAPH 2026 (Los Angeles, booth 723, July 19–23), announced June 29.
Every new version brings the same question: “Is Marvelous really the only option for clothing?” Blender has cloth simulation. ZBrush has sculpting tools. iClone and Character Creator exist. So why does this software function as the industry standard? This isn’t a feature roundup. Instead, we’re examining the structural reasons Marvelous owns the clothing pipeline, then looking at how 2026.1 strengthens that position.
Cut to the chase: Marvelous isn’t considered the standard because it’s flashy. It’s the standard because it’s virtually the only professional tool built around an actual garment design pipeline—one that starts with flat pattern drafting, progresses through seam construction, and finishes with simulation. That workflow is the differentiator.
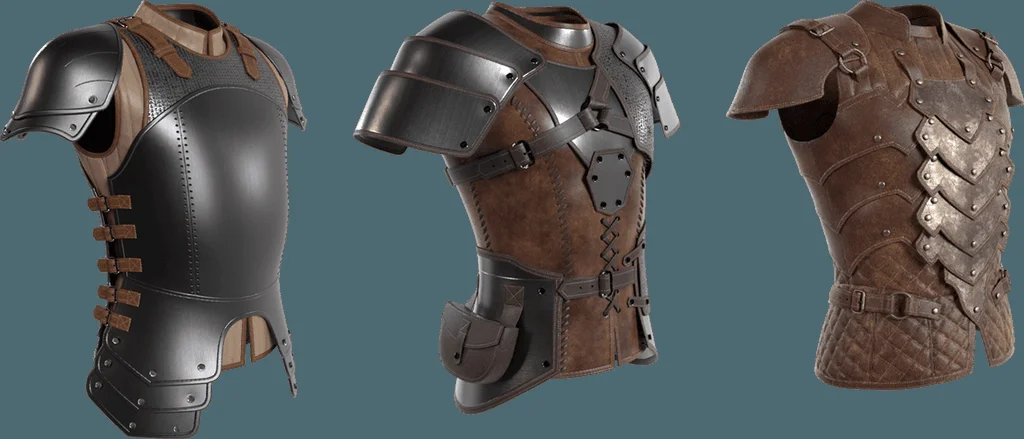
“Other Tools Can Do It” — Why the Alternative Debate Never Ends
Blender’s cloth simulation, ZBrush’s sculpt cloth brush, and iClone/Character Creator’s physics-based garments come up constantly as alternatives. None of them are failures—you absolutely can dress a character using any of these tools and get a result.
The catch? All these alternatives approach fabric through draping or sculpting. You’re either applying physics to an existing 3D mesh or carving geometry directly in 3D space. What’s missing is the garment design phase itself—flat 2D pattern drafting, dart distribution, seam allowance planning, and stitch-line construction.
There’s a crucial difference between “it works” and “it’s engineered like an actual sewn garment.” One produces cloth draped over a body. The other produces a garment designed through actual tailoring logic. These aren’t comparable on the same axis. The alternative debate loops because this distinction doesn’t show up clearly in final renders.
Alternative tools deliver “fabric hanging on a body.” Marvelous delivers “a pattern-engineered garment worn on a body.” The gap becomes obvious during revisions. With pattern structure, you adjust darts or seam allowance to reshape the silhouette. With 3D mesh draping, that structure doesn’t exist.
| Tool | Garment Design (Pattern & Seam Work) | 3D Simulation |
|---|---|---|
| Marvelous Designer | Yes (2D pattern & construction) | Yes (garment-native) |
| Blender Cloth | No | Yes (general physics) |
| ZBrush | No | No (sculpting focus) |
| iClone / CC4 | Partial | Yes (rigging & avatar-focused) |
The compatibility assessment in the table above is based on explanations from primary sources (CG Channel, Digital Production) and the author’s interpretation of each tool’s design philosophy. Specific implementations may vary depending on project requirements.
Where things really diverge — the pattern-to-seam-to-simulation pipeline
The real challenge in character clothing isn’t draping fabric onto a body. It’s designing how the garment sits and falls properly. How a jacket’s shoulder seam settles, where trouser darts form at the waist, how a shirt sleeve pulls with arm movement—these are all determined by the pattern structure itself. Without this design data, simulation just runs physics calculations. It never learns the logic of how clothing actually works.
Marvelous Designer’s workflow mirrors real garment construction almost exactly. CG Channel describes it as “designing 3D clothing by sewing 2D pattern pieces together the same way you’d make an actual garment.” You draw 2D pattern sheets, distribute darts and seam allowances, stitch pieces together with seam lines, then run simulation on your character. That sequence is the pipeline.
Maya and Blender cloth simulation, by contrast, apply physics to 3D geometry without any of that design data. You get silhouette, sure, but adjusting garment structure becomes a nightmare. Tweaking shoulder lines or changing waist fit means editing vertices, not modifying patterns. You can’t predict how those edits will behave in simulation.
With Maya or Blender cloth, iterating on garment silhouette means re-editing the mesh and re-running simulation every single time. Without pattern structure, even a simple fix like “raise the shoulder seam 1cm” becomes a full mesh rebuild. In Marvelous, you adjust one line in the 2D pattern and simulation responds instantly.
Where Marvelous fits in a real character clothing pipeline
Both CG Channel and Digital Production describe Marvelous Designer as a tool “widely adopted across game and animation studios.” In production pipelines, Marvelous handles the garment design and simulation phase. Studios rarely finish an entire clothing pipeline inside Marvelous alone.
The workflow breaks down like this: you import your avatar or rigged character into Marvelous, draft your patterns, run simulation, then export to FBX, Alembic, USD, OBJ, or glTF downstream. Everything after that—topology cleanup, close-up texture detail, rendering, engine integration—belongs to other tools. You can also pass simulation cache as Maya cache, PC2, or MDD format.
Understanding this division of labor matters. If you come in expecting Marvelous to handle everything end-to-end, you’ll hit walls with topology issues and close-up detail work. Map out which stages Marvelous excels at and which require other tools, then design your pipeline around that reality.
| Pipeline Stage | Primary Tools | Marvelous Role |
|---|---|---|
| Character Model / Avatar | Maya / Blender / CC4 | Avatar Import |
| Garment Design | Marvelous Designer | 2D Patterns and Seaming (Core Stage) |
| Cloth Simulation | Marvelous Designer | Simulation (Core Stage) |
| Topology & Texturing | Maya / Substance / ZBrush | Asset Handoff & External Tools |
| Engine & Rendering | Unreal / Unity / Arnold | Export as FBX, USD, and More |
Clothing meshes exported from Marvelous Designer are simulation results, so polygon distribution can be uneven. For close-up shots or game engine LOD work, it’s standard practice to retopologize in Maya or Blender before final asset delivery.
Marvelous Designer’s Production Strengths — Simulation, Garment Construction Workflow, and Pipeline Integration
Marvelous Designer excels at cloth simulation that behaves like real fabric. When a sewn garment is placed on a character, the silhouette responds to weight, tension, and friction. This isn’t just “attaching fabric”—it’s letting the silhouette fall according to garment structure logic. That’s why clothing looks alive in games and animation.
The workflow itself is fundamentally different from other tools. Instead of sculpting forms in 3D space, you cut patterns, leave seam allowances, stitch seams together, and fit them on the body. Change a single pattern piece, and the simulation reacts instantly. This workflow demands a completely different mindset than traditional 3D modeling, and other software just can’t replicate that feeling.
Production features reinforce this approach. 2D pattern editing lets you design darts and seam allowances. Real-time simulation viewport gives instant feedback. Fabric presets apply stretch, stiffness, and friction per material type. Whether stylized or photorealistic, wrinkles and drape come from garment structure itself—that’s Marvelous Designer’s real production advantage.
Pipeline compatibility keeps this tool in the workflow. Export simulation results as Alembic, FBX, USD, OBJ sequences, Maya cache, PC2, or MDD—then move seamlessly into Maya, Blender, Unreal, or Unity. Studios split the work this way: Marvelous handles patterns, seams, and simulation; the result passes downstream. That’s why game and VFX teams use it.
Version 2026.1 — What’s New
2026.1 launched August 24th as the follow-up to 2026.0, which shipped in April 2026. Version 2026.0 introduced 3D Pencil and Lacing Tool; 2026.1 adds four new features on top of that foundation. It went live after the Pioneer Program early access period.
The most-requested feature this cycle is Seamline Rip Tool. It tears fabric along seams—when simulation forces exceed a threshold (Rip Resistance), the seam opens. Fraying generates automatically on the torn edge, with customizable fraying density, bridge probability, gravity, and material response. Use it for combat, transformation sequences, tattered clothing, or aged fabric looks.
That said, Seamline Rip is still in Beta. According to Digital Production, the fray feature is currently disabled on Mac, and frayed threads can’t yet be exported as geometry. Before deploying this to production work, verify these limitations firsthand.
Brush Pinching is a new pinching workflow that lets you paint wrinkles and folds directly onto fabric surfaces. As CG Channel describes it, you’re essentially drawing creases freeform across the cloth. Pinching Simulation Override temporarily overrides global cloth and simulation values while you’re using the pinch brush. With Override Strength (0–1), you can blend between your original simulation settings and the override, which locks in stylized wrinkles in-app and eliminates the need to jump into another tool for sculpting adjustments. These two features are designed to work hand-in-hand.
Blend Shape Animation extends the blend shape support introduced in the last update. You can now keyframe avatar blend shape values directly on the timeline, giving you loop and timing control inside the app without needing separate morph targets. It’s useful for facial animation and corrective morphs, and supports blend shape animation import/export via FBX, glTF/GLB, Alembic, and USD.
| New Features | One-Line Summary | Primary Use Cases |
|---|---|---|
| Seamline Rip (Beta) | Tear cloth along seam lines and auto-generate thread fraying | Battle damage, transformations, torn clothing effects |
| Brush Pinching | Paint wrinkles and folds with a brush | Detailed fabric creasing and bunching |
| Pinching Simulation Override | Temporarily override simulation values while pinching | Lock in stylized looks |
| Blend Shape Animation | Keyframe blend shapes on the timeline | Facial and corrective morph animation |
Seamline Rip is currently in Beta. The fray feature is disabled on Mac, and thread geometry can’t yet be exported as mesh. Before using this on commercial projects, check the official support docs for the latest limitations.
All four new features push Marvelous Designer’s existing strengths in garment design and simulation further. This isn’t a departure into new territory—it’s a refinement update that gives you finer control over what Marvelous already does well.
Individual subscription pricing runs $39/month or $280/year (prepaid, no auto-renewal), while enterprise sits around $199/month (node-locked) or $2,000/year (floating). A 14-day trial is available. That said, pricing and plan structure can shift, so confirm current rates directly on the official site before committing.
Frequently Asked Questions
Can existing Marvelous 2026.1 subscribers use the update at no extra cost?
Pioneer Program participants get one free month of 2026.1—that’s been confirmed. Whether general subscribers get the update included depends on their subscription tier. Check the official support page or your account settings for the most current details.
Why is it so difficult to create character clothing using only Blender’s Cloth simulation?
Blender Cloth works by layering physics properties onto existing 3D geometry. Without 2D pattern drafting or seam construction, any adjustments to garment silhouette require vertex-level mesh editing rather than pattern modification. Even minor tweaks—like raising a shoulder line—force you into a cycle of mesh manipulation and re-simulation. The core issue is that design changes can’t be approached through garment logic; they become purely geometric operations, making iteration and reproducibility exponentially harder.
Can I use Seamline Ripping Tool (Beta) on commercial projects?
It’s currently in Beta. On Mac, the fray feature is disabled, and frayed geometry can’t be exported as mesh yet. Before applying it to production work, verify these limitations align with your project requirements. Since Beta functionality and export constraints can shift between versions, check the official documentation for the latest status.
How does the workflow differ when building clothes in Marvelous Designer compared to other tools?
Marvelous Designer follows a 2D pattern drafting → seam construction → simulation pipeline. Design revisions happen at the pattern piece level, and simulation updates automatically. Other tools—Blender Cloth, ZBrush, iClone—approach garment creation through draping or sculpting 3D geometry. Without pattern structure, revisions work at mesh level, fundamentally changing both the iteration cost and how reproducible your designs become.
- Marvelous Designer has become the industry standard for character clothing because it’s essentially the only production-grade tool that implements an actual garment design pipeline: pattern drafting → seam construction → simulation.
- Alternatives like Blender Cloth, ZBrush, and iClone handle fabric through draping and sculpting. Without pattern-based architecture, their revision and reproducibility workflows are fundamentally different.
- Marvelous Designer doesn’t own the entire pipeline. Its strength lies in garment design and simulation; topology cleanup, close-up texturing, and engine integration still require other tools.
- The 2026.1 updates—Seamline Rip, Brush Pinching, Pinching Simulation Override, and Blend Shape Animation—extend Marvelous Designer’s core strengths in design control and simulation refinement, giving you finer-grained manipulation.
- Seamline Rip is in Beta. Fray is disabled on Mac and can’t export as geometry yet. Confirm official documentation before production use.
- If your project involves repeated garment silhouette design and revision cycles, Marvelous Designer is the right fit. Pattern-based modification costs less in rework than mesh-level editing.
- Plan for retopology and texturing passes before handoff to game engines or renderers. Budget that into your pipeline upfront.
- Seamline Rip can be applied directly for torn clothing and combat sequences, but being Beta, test it separately from critical pipeline stages before full integration.
- With Pinching Override and Brush Pinching, run small-scale tests first to see whether they reduce sculpting overhead on stylized garments before committing to the workflow.
- Pricing, plans, and licensing terms are subject to change—always verify the latest conditions directly on the official website before purchasing or renewing your license.
※ This article is based on publicly available information and real-world production environments. Specifications, licensing terms, and commercial usage rights may change, so please cross-reference the official documentation.