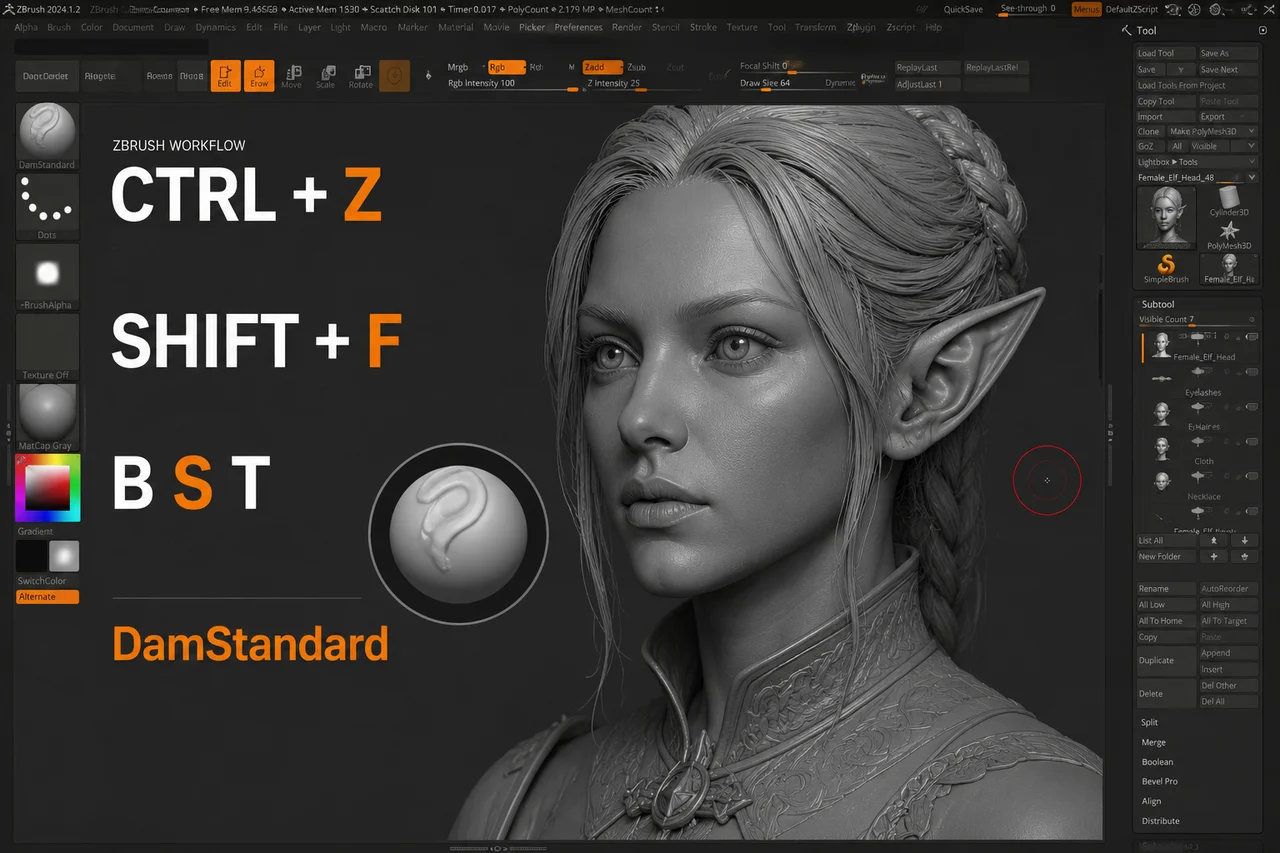
Knowledge
The Ultimate ZBrush Shortcut Reference Guide
ZBrush Reference
Built for 3D artists, character sculptors, and digital creators.
This shortcut guide is designed to speed up everyday ZBrush workflows
and keep essential hotkeys within easy reach.
Whether you’re sculpting characters, creatures, hard-surface models,
or concept designs, we hope this reference helps you save time and
stay focused on creating.
( Click a category, then use the back-to-top button in the bottom right to return to the top )
A categorized, searchable hotkey guide for sculpting, masking, ZModeler, SubTools, Timeline controls, rendering, and interface customization.
No matching shortcuts found.
Getting Started & UI
Ctrl + O
Open Project
Ctrl + S
Save Project
Ctrl + Z
Undo
Ctrl + Shift + Z
Redo
Popup Selection (PC only)
Section marker
F1
Tools
F2
Brushes
F3
Strokes
F4
Alphas
F5
Textures
F6
Materials
Spacebar / Right-click
Show Quick Menu
Tab
Show / Hide Floating Palettes
Ctrl + hover over an item
Show item description when popup info is enabled
Ctrl + Alt + hover over an item
Show alternate item description
Ctrl + Alt + click an item
Assign a custom hotkey, then save it in Preferences > Hotkeys
G
Projection Master
, [Comma key]
Show / Hide Lightbox
Double-click a Lightbox thumbnail
Load the selected item. Textures and alphas may load into Spotlight when active.
Shift + Z
Turn Spotlight On / Off
Z
Show / Hide Spotlight Dial
Transform Tools & Draw Settings
W
Move Mode
Middle-click + drag
Move
Ctrl + click + drag the center
Duplicate Mesh
Alt + click + drag the center or endpoint
Bend Mesh
Drag the endpoint farthest from the mesh
Stretch Mesh
Drag the endpoint next to the mesh
Flatten Mesh
Right-click and drag the end ring farthest from the mesh
Inflate
With a partially masked mesh, hold Ctrl and click + drag the center point
Create and extrude an Edge Loop
E
Scale Mode
Click + drag the center point
Scale along the axis
With a partially masked mesh, hold Ctrl and click the center point
Create an Edge Loop and contract / expand it
R
Rotate Mode
Click + drag another endpoint
Rotate around the endpoint
Click + drag the center
Rotate around the action line
Alt + click + drag an endpoint
Joint Bend around the same point
S
Draw Size
O
Focal Shift
I
RGB Intensity
U
Z Intensity
]
Increase Draw Size by set increments
[
Decrease Draw Size by set increments
T
Toggle Edit Mode
Q
Draw
W
Move
E
Scale
R
Rotate
Hold Alt while using the arrow
Switch between ZAdd and ZSub
Brushes & Stroke Controls
B
Show Brush Popup
B – S – T

Standard Brush
B – C – L

Clay Brush
B – C – B
Clay Buildup
B – C – L
ClayLine
B – D – S
ClipCurve
T

DamStandard Brush
B – I – N
Inflate
B – M – V

Move Brush
B – M – E
Move Elastic
B – M – P
MPolish
B – S – M

Smooth
B – S – A, hold Alt for the opposite spiral direction
Spiral
B – T – D

TrimDynamic
B – Z – M, then hover over a point, edge, or face on a PolyMesh3D object and press Space
Open the ZModeler context menu
M
Show all meshes in the brush
C
Pick the color under the cursor
V
Switch Color
L
Lazy Mouse Mode
1: hold Ctrl and move the secondary tool to constrain before use
Replay Last Stroke
3
Record Stroke
2
Replay All Recorded Strokes
6
Smooth Curve
5
Snapshot Curve
Alt + draw across a curve
Delete Curve
Shift + Ctrl + T
Save Tool
F (you may need to press it twice)
Fit Mesh to View / Frame
View, SubTools & Geometry
P
Dynamic Perspective
Shift + P
Floor Grid
X
Activate Symmetry
Shift + F
Show / Hide PolyFrame and PolyGroups
Q
Point Selection Mode
Ctrl + P
Set Pivot Point
Shift + P
Clear Pivot Point
Shift + S
Snapshot the current version to the canvas
N
List All SubTools
Alt + click a SubTool
Select SubTool
Shift + Alt + click the selected SubTool
Frame SubTool. This option can be configured in Preferences > Edit > Auto Center: 0 = Off, 1 = Alt + click, 2 = Shift + Alt + click.
Click the brush icon
Toggle Polypaint Colorize
Shift + click the brush icon
Toggle Polypaint Colorize for all SubTools
N
Divide
Shift + D
Lower Subdivision Level. If the geometry has subdivision levels, this moves one level down. If it has no subdivision levels and Dynamic Subdiv is active, it turns Dynamic Subdiv off; press D to turn it back on.
D
Higher Subdivision Level. If subdivision levels exist, this moves up through existing levels only; it does not create a new level. If no subdivision levels exist, ZBrush may offer to enable Dynamic Subdiv.
Ctrl + E (with a partially hidden mesh)
Edge Loop
Edit > Draw Mode, then Ctrl + drag on the background
Remesh with DynaMesh Sculpt
A while hovering over the mesh
Toggle HD Sculpting Mode On / Off
A while hovering over the background
Render all HD Geometry
Masking & PolyGroups
Ctrl + H
View Mask
Ctrl + I
Invert Mask
Ctrl + A
Mask All
Hold Ctrl while choosing a brush from the popup
Select a Masking Brush
Hold Ctrl
Paint a mask on the object. Alphas and strokes can be used.
Hold Ctrl + Alt
Erase or paint the inverse mask
Ctrl + click the background
Reverse Mask, also known as Flip Mask or Invert Mask
Ctrl + click + drag on the background
Clear Mask
Ctrl + click, release Ctrl, then drag from the mesh
Mask with constant intensity
Ctrl + click and drag; choose an alpha while holding Ctrl
Mask with alpha intensity using MaskPen or MaskRect
Ctrl + click the mesh
Blur / soften the mask
Ctrl + Alt + click the mesh
Sharpen the mask
Ctrl + click + drag the action line on the model
Move, Scale, or Rotate mode
Ctrl + W
Group Masked and Clear Mask
Ctrl + W
Create one PolyGroup from all visible polygons
Visibility, Selection & ClipCurve
Hold Shift + Ctrl while choosing a brush from the popup
Select a Selection or Clip Brush
Shift + Ctrl + click, release the keys, then drag the green selection area
Show part of the mesh
Shift + Ctrl + click, release the keys, drag, then hold Alt for the red selection area
Hide part of the mesh
Ctrl + Shift + X
Grow visible mesh area
Ctrl + Shift + S
Shrink visible mesh area
Ctrl + Shift + A
Grow all visible mesh areas
Ctrl + Shift + O
Outer Ring Visibility
Press Space without releasing the mouse or pen
Move the selection or clip area
Shift + Ctrl + click the background
Show the entire mesh
Shift + Ctrl + click
Show only the selected PolyGroup on a fully visible mesh
Shift + Ctrl + double-click
Hide the selected PolyGroup on a fully visible mesh
Shift + Ctrl + click
Hide the selected PolyGroup on a partially visible mesh
Shift + Ctrl + click and drag on the background
Invert Visibility
With the Lasso option selected, Shift + Ctrl + click
Hide Edge Loop
Press Alt once
ClipCurve adds a soft direction change
Press Alt twice
ClipCurve adds a sharp direction change
Hold Alt
Reverse the Clip Area
Stencils, ZSpheres & 2.5D
Alt + H
Turn Stencil On
Ctrl + H
Hide / Show Stencil
Space
Coin Controller
A
Preview Adaptive Skin
Drag a ZSphere
Add a child ZSphere
Alt + click a ZSphere
Delete ZSphere
Click + drag, then hold Shift
Add a child ZSphere with the same size
Click + drag to size the new ZSphere, then Ctrl + drag
Add a child ZSphere and resize the Link Sphere
Click a Link-Sphere
Insert ZSphere
Alt + click a Link-Sphere while using Tool > Adaptive Skin > Classic Skinning
Define a magnet sphere / break mesh
Drag a ZSphere
Move ZSphere
Drag a Link-Sphere
Pose / move the natural link
Alt + drag a Link-Sphere
Move Chain
Drag a ZSphere
Scale ZSphere
Alt + drag a Link-Sphere
Inflate / Deflate Chain
Drag a Link-Sphere
Scale Chain
Drag a ZSphere
Spin Chain
Alt + drag a Link-Sphere
Control Twist
Drag the link area
Rotate Chain
Shift + A with a ZSphere armature in Edit Mode
Activate ZSketch Edit Mode
A
Preview Unified Skin
Hold Alt
Reverse 2.5D Brush Effect
Shift + Ctrl + F
Crop and Fill
Shift + Ctrl + G
Grab Texture from Document
Canvas, Layers & Zoom
Ctrl + N
Clear Layer
Ctrl + F
Fill Layer
Ctrl + B
Bake Layer
Shift + click
Turn all layers on or off from a layer thumbnail
~ + canvas click (US) / @ + canvas click (UK)
Select the layer containing the clicked pixol
~ + drag (US) / @ + drag (UK)
Move layer content up, down, or sideways on X and Y
Ctrl + M
Remove Marker
0 (zero, not the letter O)
Actual Size
Ctrl + 0 (zero, not the letter O)
Antialiased Half Size
+ (plus sign)
Zoom In
– (minus sign)
Zoom Out
Timeline & Movie
Click the timeline
Place a new keyframe
Click a keyframe dot
Select an existing keyframe
Click the selected keyframe dot
Select an existing keyframe
Click + drag a dot to a new position; dragging off the end deletes it
Move the selected keyframe
Shift + Ctrl + click a keyframe dot
Store new data in the existing keyframe
Click + drag a dot off the timeline
Delete Keyframe
Shift + click the timeline at the point you want to copy to
Copy the selected keyframe
Shift + click all keyframe dots you want to copy, then Shift + click the timeline at the target point
Copy multiple keyframes
Ctrl + click an existing keyframe dot
Create Transition Keyframe
Alt + click an existing keyframe dot
Create Hold Keyframe
Left Arrow
Move to previous camera keyframe
Right Arrow
Move to next camera keyframe
Shift + click the timeline cursor
Play Timeline as a loop
Esc
Stop Timeline Playback
Shift + Ctrl + click the timeline cursor after setting the start point with the Left Arrow
Record the timeline as a movie
Press Alt twice
ClipCurve adds a sharp direction change
Hold Alt
Reverse the Clip Area
Ctrl + Shift + ! (US) / Shift + Ctrl + PageUp (UK)
Snapshot to Movie
Rendering, Interface & ZScript
Shift + R
Best Preview Render / BPR
Shift + Ctrl + R
Render All
Ctrl + R
Render Cursor Selection
Ctrl + Alt + drag while Enable Customize is on
Move an item to a custom interface location
Ctrl + Alt + drag to the canvas while Enable Customize is on
Remove an item from a custom interface location
Shift + Ctrl + I
Store Configuration File
Ctrl + L
Load UI Configuration File
Shift + Ctrl + Alt + I
Save UI Configuration File
Shift + Ctrl + L
Load ZScript
Ctrl + U
Reload ZScript
H
Show / Hide ZScript Window