
3D Graphics
Maya Hypershade for Beginners: Demystifying Nodes, Materials, and Rendering (Step-by-Step Guide)
Why Modeling Goes Smoothly, But Materials Trip You Up
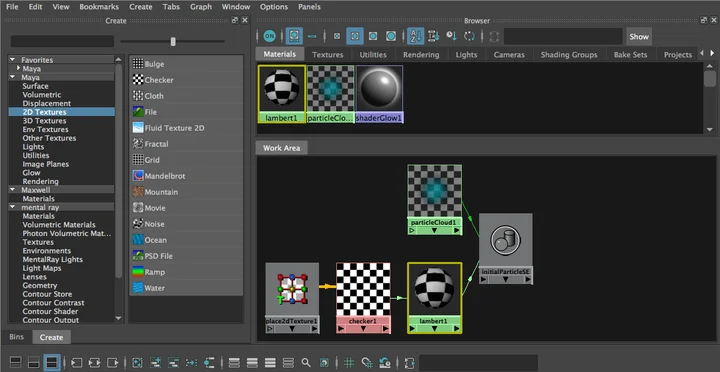
Most people starting Maya begin with modeling. Moving vertices, cleaning edges, refining forms—these tasks give immediate visual feedback, making them relatively intuitive. But once you move into material creation, the workflow changes completely. Instead of shaping geometry, you’re building networks of textures, shaders, and attributes.
Many users panic when opening Hypershade for the first time. Complex node networks, countless property panels, and an unfamiliar interface arrive all at once. Unlike modeling tools where you manipulate things directly on screen, materials and textures require understanding how connections flow through networks—a steeper learning curve.
Yet in Maya workflows using Arnold, nearly all material setup eventually centers on Hypershade. From Base Color texture connections to Roughness, Metalness, Normal Map, and Displacement settings—the core processes determining your final render all happen here. In other words, Hypershade isn’t optional; it’s the heart of Maya’s rendering pipeline.
This article won’t list Hypershade menus or ask you to memorize functions. Instead, we’ll focus on why Hypershade exists, how nodes connect, and what perspective you need to approach Arnold materials correctly.
Hypershade Is Simpler Than It Looks
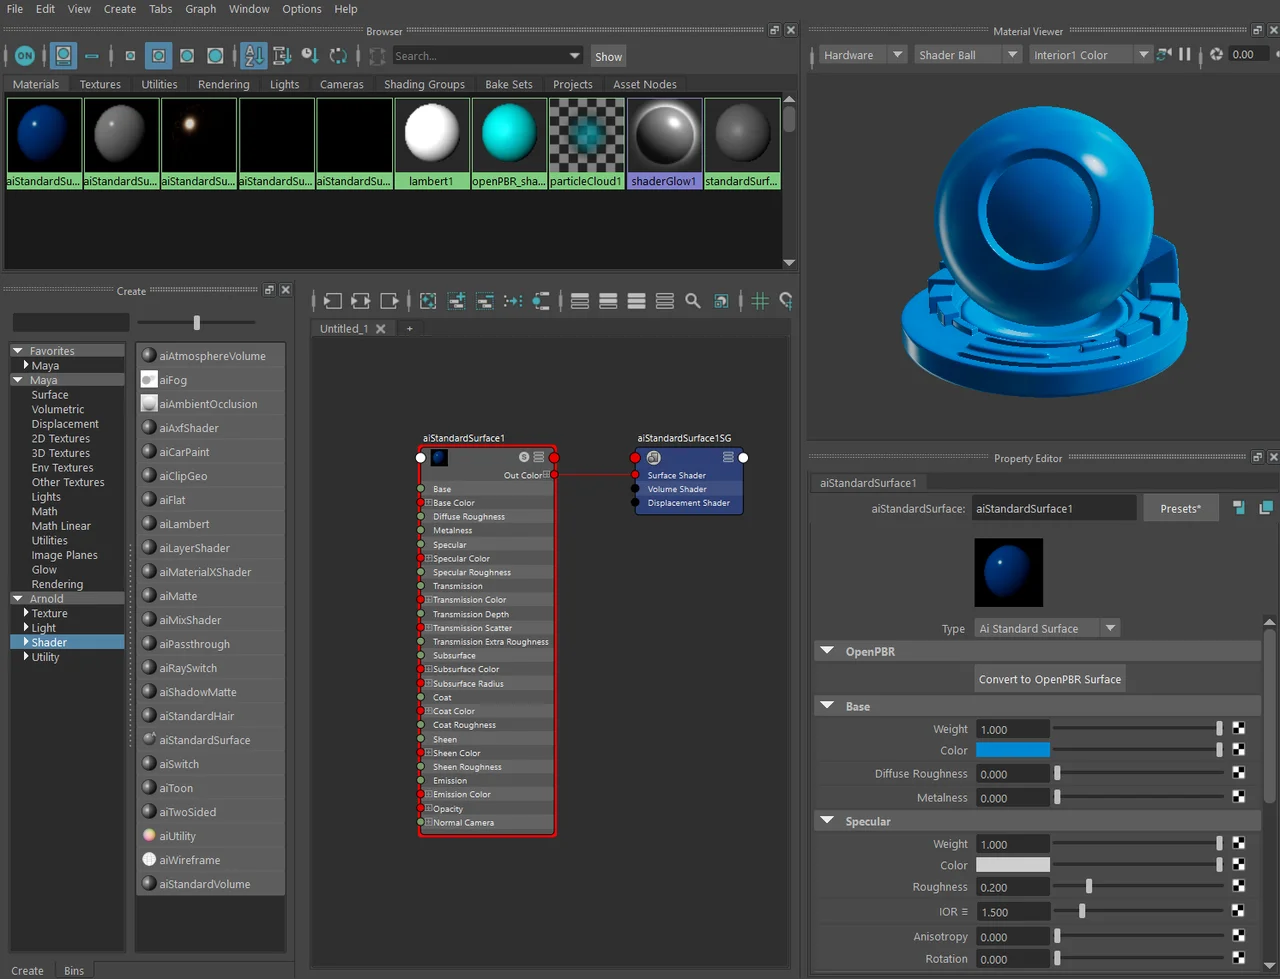
Opening Hypershade for the first time feels overwhelming. All those nodes and panels can feel like a separate program entirely. But its actual job is surprisingly straightforward—think of it as a dedicated materials editor that centralizes everything you create, connect, and manage in Maya’s material and texture workflow.
Just as you spend most of your time modeling in the viewport, you’ll spend most of your material workflow inside Hypershade. Creating new Arnold materials, connecting textures, and verifying node structures all occur here. It seems complex at first, but once you understand each panel’s role, the structure is far simpler than it appears.
Hypershade has been Maya’s signature node-based material editing environment for years. Today, node-based material workflows have become standard across major 3D applications such as Blender, Houdini, and Cinema 4D. While it may feel unfamiliar initially, once you grasp the principles, you can apply similar logic across different programs.
| Component | Role |
|---|---|
| Create Panel | Create and search new nodes |
| Browser Panel | View materials and lights in your scene |
| Work Area | Edit node connection structure |
| Property Editor | Adjust properties of selected nodes |
| Shading Group | Bridge materials to objects |
When scenes contain many materials, Browser Panel excels at organization and searching. Using sort-by-name and sort-by-type features lets you quickly locate what you need, even in complex scenes.
Understanding Nodes Makes Hypershade Easy
In Hypershade, understanding how data flows through a network is far more important than memorizing individual nodes. Every material follows a similar structure.
Depending on the workflow, Utility Nodes can be inserted between textures and shaders to process specific types of data.
Textures provide image-based information. File Texture nodes read image files and pass that data through the network. Utility Nodes modify or convert data along the way; aiNormalMap, for example, is commonly used when connecting Normal Maps. Shaders use this information to define the final appearance of a surface, with aiStandardSurface serving as Arnold’s primary material shader.
A Shading Group acts as the bridge between a shader and an object. Although many users rarely interact with it directly, every material assignment in Maya passes through a Shading Group. Even a perfectly built material will fail to render correctly if the Shading Group is not connected properly.
The Work Area provides a visual representation of the entire network. Input Connections show what feeds into a selected node, while Output Connections reveal where that data flows next. Displaying both at the same time makes it much easier to understand the complete material network. You can also use Graph Materials on Selected Objects to instantly display the material network assigned to a selected object, making troubleshooting significantly easier.
Why Learning Just aiStandardSurface Is Enough
n Arnold, most material creation begins with aiStandardSurface. In older workflows, different shaders were often used for plastics, metals, glass, and other materials. Today, aiStandardSurface can reproduce most of these surface types within a single shader. For beginners learning Hypershade, understanding aiStandardSurface is far more important than exploring a large collection of Arnold shaders.
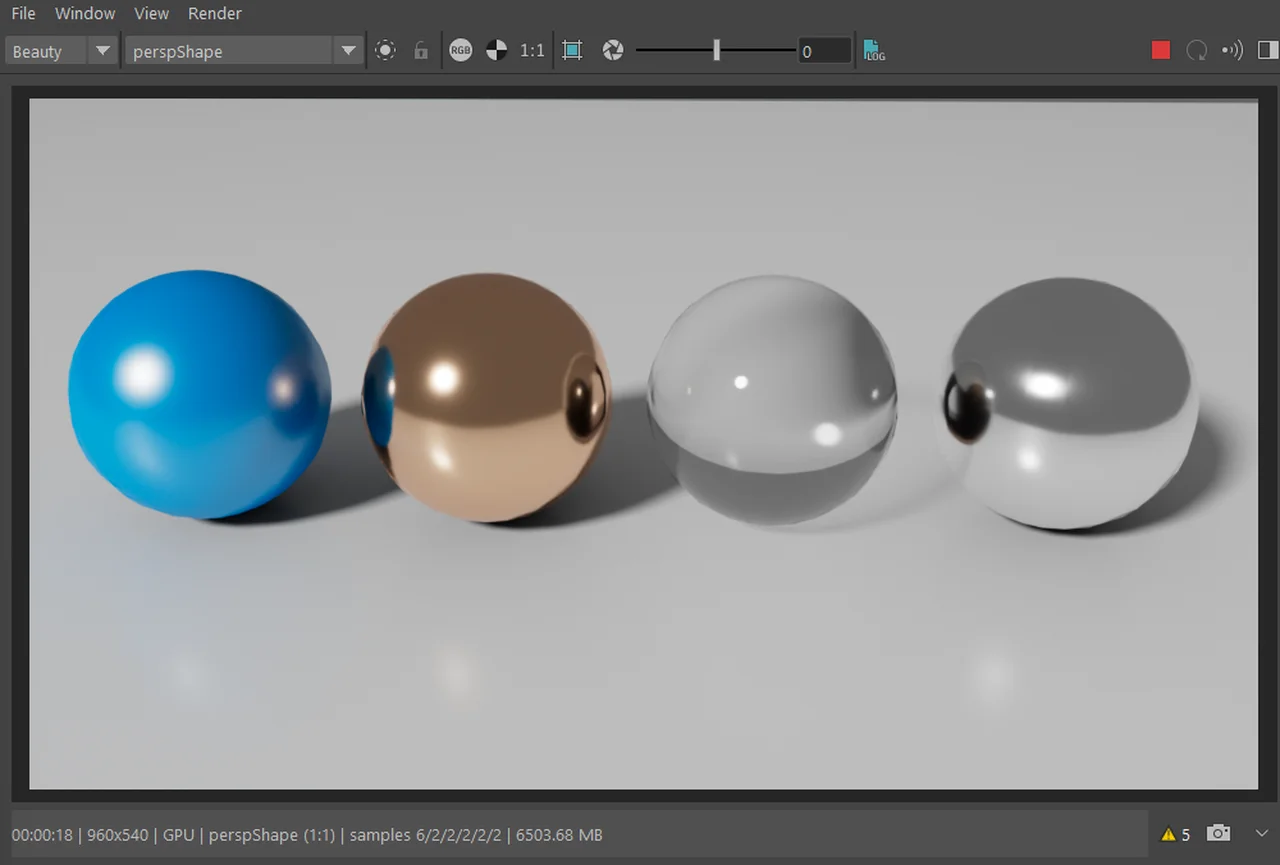
Although aiStandardSurface contains many parameters, only a small number are used regularly. Base controls the material’s primary color. Specular defines its reflective properties. Setting Metalness to 1 converts the material into a metallic surface, while Roughness controls how sharp or blurry reflections appear. Transmission is used for transparent materials such as glass and liquids. Subsurface simulates light scattering beneath the surface and is commonly used for skin and other translucent materials. Coat adds a thin reflective layer similar to clear coat on automotive paint, while Emission allows the material to emit its own light.
| Property | Role |
|---|---|
| Base | Base surface color |
| Specular | Reflections and highlights |
| Metalness | Determines metallic quality |
| Roughness | Clarity of reflection |
| Transmission | Glass, light transmission |
| Subsurface | Skin, internal scattering |
| Coat | Additional coating layer |
| Emission | Self-illumination |
Most PBR materials are built around three core properties: Base Color, Roughness, and Metalness. These values determine whether a surface appears metallic or non-metallic, polished or weathered. For beginners, focusing on these three parameters is often enough to establish the material’s overall character. More advanced features such as Transmission and Subsurface can be introduced later when a specific material requires them.
How to Connect PBR Textures in Hypershade
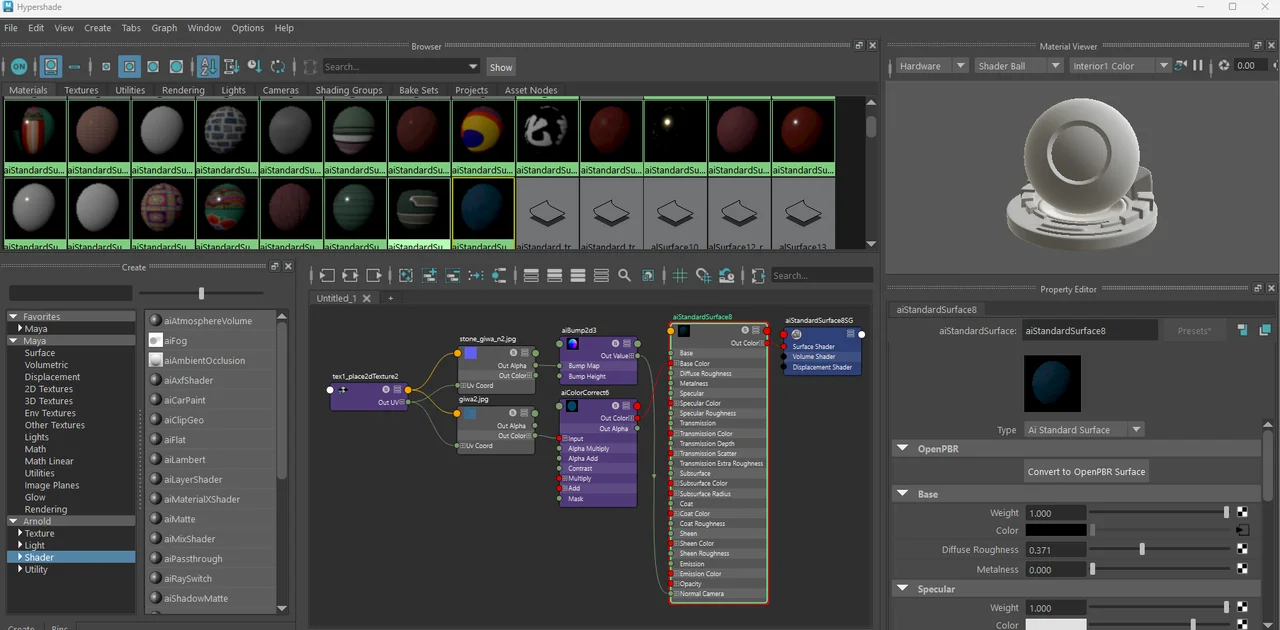
When working with PBR textures, each texture map is connected to a specific input on aiStandardSurface. The process is always the same: click the checker icon next to a parameter, choose File Texture, and select the appropriate image file. The checker icon simply indicates that the parameter will be driven by a node rather than a constant value.
Base Color maps are connected directly to the Base Color input. Roughness maps are typically connected to Specular Roughness, while Metalness maps connect to Metalness. For Normal Maps, the texture should not be connected directly to Normal Camera. Instead, it should pass through an aiNormalMap utility node before reaching the shader.
Displacement works differently. Rather than connecting to the shader itself, displacement maps are connected to the Displacement Shader input of the Shading Group. In addition, subdivision must be enabled on the mesh for the displacement effect to appear at render time.
| Texture | Connection Point |
|---|---|
| Base Color | Base Color |
| Roughness | Specular Roughness |
| Metalness | Metalness |
| Normal Map | aiNormalMap → Normal Camera |
| Height Map | Shading Group Displacement |
| Emission Map | Emission Color |
Misunderstand Color Space and Your Materials Break
Many Arnold rendering issues can be traced back to incorrect Color Space settings. A texture’s Color Space determines how its data is interpreted, and using the wrong setting can significantly affect the final render.
Textures that contain visible color information should typically use sRGB. This includes Base Color and Emission maps. Data maps such as Roughness, Metalness, Normal, and Displacement should be set to Raw (or Non-Color, depending on the workflow).
If this distinction is ignored, roughness values may appear far too strong or too weak, and Normal Maps can produce incorrect shading results. For this reason, checking the Color Space of every texture is one of the most important habits to develop when working with Arnold materials.
| Map Type | Recommended Setting |
|---|---|
| Base Color | sRGB |
| Emission | sRGB |
| Roughness | Raw / Non-Color |
| Metalness | Raw / Non-Color |
| Normal Map | Raw / Non-Color |
| Displacement | Raw / Non-Color |
Why Normal Maps and Displacement Maps Fail So Often
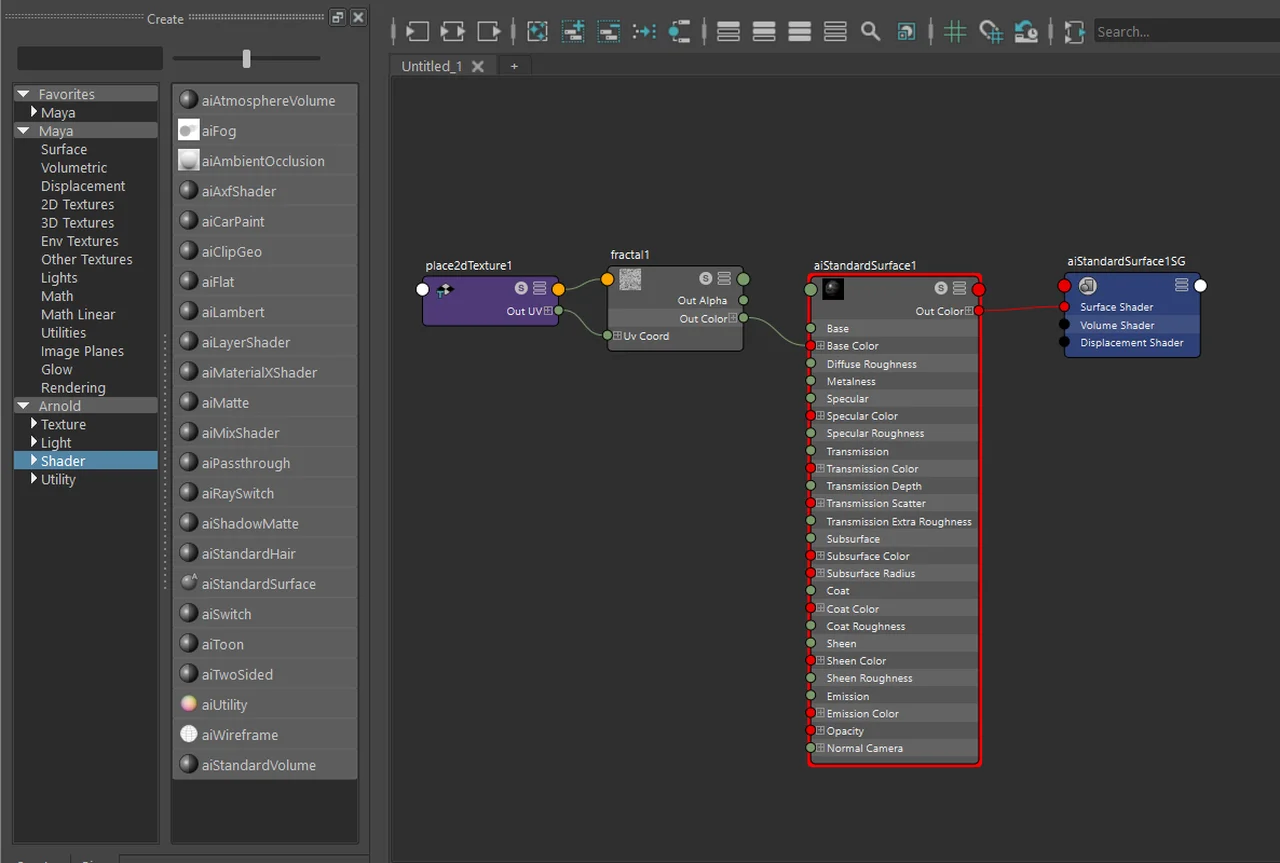
Normal Maps and Displacement Maps are essential for adding surface detail in a PBR workflow, yet they are also among the most common sources of material setup errors. Fortunately, the causes are usually easy to identify.
For Normal Maps, the texture should not be connected directly to the Normal Camera input of aiStandardSurface. Instead, it must pass through an aiNormalMap utility node so Arnold can interpret the normal data correctly. The texture’s Color Space should also be set to Raw. If it remains set to sRGB, the normals may be interpreted incorrectly, resulting in unexpected shading artifacts.
Displacement Maps follow a different workflow. Rather than connecting to the shader itself, they must be connected to the Displacement Shader input of the Shading Group. In addition, the target mesh must have Subdivision enabled in its Arnold settings. Without subdivision, the displacement effect will not appear, even if the map is connected correctly. Because subdivision directly affects render quality and render time, it should be adjusted only as much as the project requires.
The Most Common Arnold Hypershade Mistakes Beginners Make
When materials fail to appear in renders, textures display incorrectly, or normals look inverted, the issue can usually be traced to a specific cause. Understanding a few common troubleshooting steps makes these problems much easier to diagnose and resolve.
| Symptom | Primary Cause |
|---|---|
| Material doesn’t appear in render | Shading Group not connected |
| Normal Map appears inverted or incorrect | Color Space error or missing aiNormalMap |
| Displacement not working | Subdivision not set or incorrect connection location |
| Texture appears black | File path error or missing |
| Roughness looks unexpected | Color Space incorrectly set to sRGB |
Texture path issues often appear when project files are moved to another computer or when folder structures change. Setting up a proper Maya Project from the beginning and storing textures inside the sourceimages folder can help prevent many of these problems.
Shading Group issues can be diagnosed quickly using Graph Materials on Selected Objects in the Work Area. This command displays the material network assigned to the selected object, making it one of the first places to check when a material fails to appear in a render.
Your approach changes based on what kind of material you want to create
aiStandardSurface is capable of creating a wide range of materials, but not every parameter is relevant for every surface. Rather than enabling every feature, it’s usually better to focus only on the attributes that contribute to the material you’re trying to achieve. This keeps both the workflow and the render more efficient.
| Material Type | Key Settings |
|---|---|
| Plastic | Base + adjust Specular Roughness |
| Metal | Metalness 1, adjust Roughness |
| Glass | Enable Transmission |
| Skin | Enable Subsurface |
| Car Paint | Add Coat layer |
| LED / Emission | Enable Emission |
Glass and skin materials often require higher transmission and subsurface scattering samples to produce clean, noise-free renders. Identifying the material type early in the process makes it much easier to determine which aiStandardSurface parameters deserve your attention.
Before building a material, identify its most important characteristic. Is the material defined primarily by its color, reflections, transparency, or self-illumination? Once you answer that question, it becomes much easier to focus on the relevant aiStandardSurface parameters. Trying to adjust every available setting usually adds unnecessary complexity and rarely improves the final result.
Frequently Asked Questions
How do Hypershade and the Attribute Editor differ?
The Attribute Editor is Maya’s general-purpose panel for viewing and editing the properties of selected objects and nodes. Hypershade, on the other hand, is a dedicated workspace for creating, managing, and connecting materials, textures, and shader networks. While material parameters can be adjusted in the Attribute Editor, visualizing and editing node connections is much easier within Hypershade’s Work Area.
Is aiStandardSurface on its own?
In most cases, yes. aiStandardSurface can be used to create plastics, metals, glass, skin, and emissive materials, covering the majority of standard PBR workflows. Specialized shaders are still available for effects such as hair, volumes, and other advanced rendering tasks, but aiStandardSurface remains the most practical starting point for learning Arnold materials.
What’s the most common reason Normal Maps don’t work in Arnold?
Two mistakes account for most Normal Map issues. The first is connecting a File Texture directly to the Normal Camera input of aiStandardSurface instead of passing it through an aiNormalMap node. The second is leaving the texture’s Color Space set to sRGB instead of Raw. Either mistake can cause incorrect shading and unexpected surface artifacts.
Key Takeaways
- Hypershade is the central hub of Maya’s shading workflow.
- Understanding the roles of the Create Panel, Browser Panel, Work Area, and Property Editor makes Hypershade much easier to navigate.
- Materials typically follow the flow: Texture → Utility → Shader → Shading Group → Object.
- Base, Roughness, and Metalness are enough to build most basic PBR materials.
- Use sRGB for color textures and Raw/Non-Color for data maps.
- Normal Maps should pass through aiNormalMap, while Displacement Maps should connect through the Shading Group.
- When troubleshooting materials, always inspect the node connections in the Work Area first.
Production Checklist
- Identify the material type before building the shader (metal, glass, skin, etc.).
- Preview materials in Arnold immediately after connecting textures to catch Color Space issues early.
- Verify the Normal Map workflow: File Texture → aiNormalMap → Normal Camera.
- If Displacement is not visible, check both the Shading Group connection and the mesh’s Subdivision settings.
- If a material does not appear in a render, use Graph Materials on Selected Objects to inspect the assigned network.
- Store texture files inside the Maya Project’s sourceimages folder to minimize path-related issues.
※ This article was written based on public documentation and real production environments. Version, license, and commercial availability may change, so please check official documentation as well.